LYE SAFETY FIRST.
Lye is the key ingredient needed to make soap, and lots of soap makers use it every day to make soap at home with no problems at all, but if mishandled it can be a dangerous chemical. The following is important safety precautions when working with lye.
1. Never pour your liquid into lye, always pour lye into the liquid, carefully. If you pour your liquid onto lye it can cause a violent reaction.
2. Be careful not to splash or spill the lye solution.
3. Work in a well ventilated room.
4. When handling lye always wear goggles, rubber gloves and long sleeves.
5. If any lye solution comes into contact with your skin you should immediately rinse it with vinegar and then with cold water.
6. Keep out of reach of children and pets. Young children and pets should not be in the room at all while you are using lye.
7. Store lye in a locked cabinet if you have young children or pets as lye can be fatal if swallowed.
8. Use soap making equipment just for soap making. As in, you don't want to use the same stick blender on soap then for cooking food.
I did not share that with you to scare you, but safety is an important part of making soap. Now that you know what safety precautions to take we can get to the fun part, making soap!
What you will need
* Pair of safety goggles, long sleeved shirt and rubber gloves.
* White vinegar in a spray bottle.
* Scale that weighs in grams, and with the "tare" feature.
*3 sturdy plastic pitchers or extra large glass heat resistant measuring containers. (1 for milk, 1 for weighing lye & one for weighing oils in).
*Sturdy plastic stirring spoons, one for oils & one for the lye/water mix.
*2 Sturdy plastic spatulas.
*2 stainless steel thermometers.
*Large stainless steel pot to melt oils in. (Do not use aluminum pots)
*Freezer paper if using a wooden soap mold.
*Soap molds.
* Stick blender. (OK..you can make soap without one, but take it from someone who has...it really speeds up the process!)
The next thing you will need is a soap recipe and the ingredients for it. Soap recipes can be found online and in books or you can design your own, the important thing is to always check your recipe by running it through a lye calculator. (Even ones found in books! Just to be on the safe side) Just google "Lye Calculator".
Here is a recipe I used when I first started making soap. The thing I like best about this recipe is the ingredients, except for the lye can all be found at Wal-Mart or your local grocery store and this makes it a good beginner recipe to use. Since there is now restrictions because some people use lye in making drugs, lye (and many other useful things) is now much harder to find and more expensive to buy than it once was for those of us using it for legitimate purposes. (But that is a rant for another day!) Lye can be bought online, many soap supply companies such as Brambleberry sell it.
Crisco Soap Recipe
*I weigh my ingredients in grams, this is the most accurate way to weigh them, especially when working with small batches.
Lye - 172 grams
Goat's milk - 425grams
Coconut Oil - 256 grams
Olive Oil - 510 grams
Shortening (Crisco) 368 grams
Safflower oil - 128 grams * The original recipe called for Sunflower oil, but it can no longer be found at Wal-Mart.
Step 1. Set up your molds. If you are using a wooden mold, line it with freezer paper. Set out and organize all your equipment and ingredients.
 Note: I do things a little bit backwards from many. Most of the time you would want to mix your lye/water solution first as it gets very hot and takes some time to cool down. However, I use goat's milk instead of water and I make sure it is VERY cold, in fact I put it in the freezer ahead of time until it gets just "slushy". So I don't end up with dark brown, "cooked" goat's milk. For this reason my lye/milk solution does not get nearly as hot as if you were using water & it cools fairly quickly, so I actually start heating my oils up first.
 Step. 2 Weigh all your liquid & solid oils and pour into a large stainless steel pot that is on the stove burner. Use a spatula to scrape all the solid oils into the pot. Turn the burner on low, to start warming your oils and melting the solid ones, ensure solid oils are completely melted.
 Step 3. While my oils are warming up I weigh my lye for my recipe. You should have your gloves and goggles on before this step. Note: Red Devil lye can no longer be found at hardware stores, I now buy it in larger amounts in bulk online and I put what I need for a few recipes at a time into the smaller Red Devil lye container I had from the past for ease of use. And yes, between the pea yellow- green counters and funky, retro brown, 70's wallpaper..I do know I have a beautiful kitchen, it is why I bought the place really... but please save your compliments on my decor...lets concentrate on our soap batch here. ;-)
 Step 4 Carefully and slowly add your lye to your goat's milk. Never reverse the process by adding your liquid to your lye, always add the lye to the liquid. When using milk make sure it is very cold, I put mine in the freezer to get it slightly slushy first. This keeps the milk from getting over-heated. Stir until the lye is completely dissolved.
 Step 5. By this time my oils have completely melted and usually heated up to 130 degrees or so. I turn the burner off on the stove. I give the oils a gentle stir then monitor the temperature of both my oils and the lye solution until both are about 110 degrees. At that time I then slowly and carefully pour my lye solution into my pot with my oils and stir it for several minutes anyway. Remember to put any equipment with raw soap or lye solution in the sink for safety and easy clean up later.
Step 6. Time to break out the stick blender, unless you don't have one...then you can still make soap but get prepared for A LOT of stirring! Lucky you! After making one batch without one, I went out and bought one and I think the person who thought of using them must surely be a genius. OK..I love stick blenders..back to business at hand. Make sure your stick blender is in the oils before you turn it on to avoid whipping air into your mixture. Use it in short bursts, blend a few minutes, then hand stir a few minutes, and so on.
 Step 7. You will notice that the mixture will change and become thicker as you continue stirring. Continue until your mixture reaches trace stage. Tracing looks like a slightly thickened custard. It will support a drop, or your stir marks for several seconds. This isn't the best picture but if you look close you can see we are just starting to get a trace as it supports lines and drops of mixture from the end of my stick blender. Now is the time to add any Essential oils, or other additives such as poppy seeds or oatmeal if you want too. (Oatmeal will be too rough if you don't blend it up some first). If you add colorants, make sure they are compatible with the cold process soap method first. I hand stir these additives in then give it a quick blend with my stick blender for a few seconds to ensure they are well blended through the entire mixture.
 Step 8. Once that is done I pour my raw soap into my molds, using a spatula to scrape every bit of it I can get out of the pot.
 Step 9. You can use plastic wrap over your soap to prevent the ashen appearance it can get on top, but it doesn't hurt anything, it just detracts from the appearance of the soap. It can also be cut off later on too.
Step 10. I have found with milk soaps that they don't need as much insulation as other soaps, if any at all. If you are using plastic molds a towel can be set over them for a little insulation. The wooden molds I use seem to provide enough insulation themselves and so I don't cover them at all. How warm your house is probably plays a part too when it comes to insulating soaps. Let the molds set for 24 - 48 hours.
Step 11. You can now remove your soap from the mold. New soap like this has not had a chance to cure and get more mild with time, so it is a good idea to wear gloves. If it is a bit soft, give it an extra day to harden more. Then if you are using a log type mold you can cut your soap into bars. Set your soap bars in a dry, well ventilated room to cure for 4-6 weeks before use. Once it is cured, grab a bar and head to the shower...or bath...whichever you prefer.
Congratulations you just made a batch of cold process soap from scratch!


35 comments:
How fun, we used to make our soap out in our garage when we used to make goat milk soap!
WOW, what great instructions, thank you. I want to try making my own lye from our wood ashes from the stove this year. I love a challange. Thanks for this very informative post.
Chris
That is one of the best tutorials I have seen on soap.Well done!!
Thanks so much for taking the time,this will be well used as soon as our does freshen;)
Thank you so much for the photo posting and the instructions. It's beneficial too, to learn about the slushy goat's milk. I've been looking online for ways to keep the soap whiter...
What a fantastic tutorial, pictures and all! I found this post so intriguing! Thanks!
Juri
This is very similar to the recipe I used to make my goat milk soap a few years ago. I have found on box of soap I had put in the back of a closet to cure and it is PERFECT! I do not think I will be making soap for awhile, your post brings back memories, good ones.
Oh...give your kitchen a few more years and you can feature it as an "authentic old 70's" kitchen. Who knows, maybe you can auction off some of the decor to those looking for a retro look. Anything is possible, who'd have thunk the old glasses i hated with a passion are now being worn by some of the cool people.And teased hair ?.....
Thank you all for the nice comments!
LOL Kathy! Actually I saw a show on TV one time called "The ugliest bathroom" or something very similar to that. Basically, they had a contest and people sent in pictures of their bathrooms, and the person with the UGLIEST bathroom won...a complete, new remodel of their bathroom! I was going to send in pictures of my kitchen if they ever had an "ugliest kitchen" contest, but if they did I must have missed it. LOL.
You covered the process very well. It takes a lot of tweaking, trial and error, ins and outs, but this is the basics of it.
Chris, I know someone up in MI that has done exactly that. The old leaching method! Do you have a leacher?
Jennifer! I have seen that exact thing done on shows on HGTV. The worst case scenarios get the re-do's. You are a good lady for sharing your kitchen. I have beautiful areas in my home, but you should see the bad ones (that we have not remodeled at all). You would croak. LOL!!! Take care.
Structurally my kitchen is in very good shape, it is just the decor of it...and you all didn't even get to see the 70's green/tan flooring. Hopefully we will be able to get the farm house remodeled before it all comes back in style like Kathy said. LOL
Thank You, thank You. Love the pictures...I'll need them!
GREAT tutorial. I have made soap once recently and plan to do again, real soon!
How did you come up with the idea of making goat soap? I never would, but what a tip!
Thank you Patrice and Country girl!
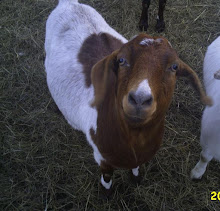
Thank you for the question Esther. Most of our goat herd is Boer meat goats, but I do have a couple dairy goats. The plan was to use the extra milk from the dairy does to feed any orphaned Boer kids we may have. The problem was, my Boer girls are great mothers and we rarely ever have bottle kids, so we had lots more milk than we could use. I had to think of ways to use more of it.
My husband likes to make goat cheese and after hearing of all the benefits of goat's milk soap I started making it. Goat's milk contains skin smoothing and softening properties that water does not. Store bought soap makes both of our skin so itchy and dry. We couldn't believe the difference the homemade goat's milk soap made, no more dry skin, no more itchy skin. We love it, and will never go back to store bought soap!
HI Jennifer!
This is a GREAT blog about soapmaking. I have never seen it explained so well. I am scared of trying to make soap, but now I think I'll start collecting the instruments and so on and give it a go. I love the goats milk soap I've gotten from Jama.
This is so great! I've been wondering how to do exactly this, and have had no idea. Thank you for being so thorough in your instructions! You make me want to get goats just so that I can make goats milk soap too. It is definitely on my list of things I'd like to do here on our new homestead!
That's is quite a process if you ask me, definitely one I wouldn't bother with since I am lazy when it comes to making things myself, I don't even cook! Great instructions here though for anyone wanting to try it!
Congrats on your SITS day!
Thanks for explaining so clearly, I will have to try this after Christmas!
Wow, that's neat! I've never tried goats milk soap before, but now you've made me curious!
i've always wondered how complex it might be and it really has a lot of steps! i love goat's milk soap, but not so sure i would ever try to make it on my own!
i want some of this soap! my eczema kiddos love goats milk soap...well, their skin does! how fun. i had no idea it was that complicated...and that much fun too! who knew making soap could be so explosive if done wrong!
I've never tried this before...and I really never knew Crisco could be used to make soap. Wild! It looks like a fun process.
I remember my grandmother making her soap (I don't think it was from goat milk though). I also remember getting my mouth washed out with that lye soap a couple of times for back-talking her. Never realized it was so dangerous.
WOW! Time consuming. I hope a lot of people on your list get soap.
Homemade soap! Oh I love it! Happy SITS day!!
Wow that is really interesting. I never would have thought Lye would be a key ingredient...learn something new everyday :)
wow, this makes it sound so simple, yet there's a lot to it. At some point I want to try my hand at it, but I know it won't be anytime soon.
thank you for taking the time to write all that up, I bet a lot of people have found it very useful!
Wow, that is really cool! I never knew how that was done. Very interesting!
Wow! I'm thinking I might just buy the soap from you instead of attempting to make it. I will surely blow myself up...
Everytime I think about making soap it reminds me of a hot hot hot Brad Pitt in Fight Club making the soap out of the liposuctioned butt fat...
Ok, I'll stop talking now. Great site! Happy SITS.
Alex aka Ma What's For Dinner
www.MaWhats4dinner.com
This was pretty informative. I would have never thought making soap could be so dangerous! It's good to know something about what is going on my body everyday! Great tutorial!
I love soap-making. There is nothing better than a bar of home-made soap. Happy SITS day!
Thanks for sharing the tutorial. It was interesting because I really had no idea what all was involved. Not sure I would ever have the patience to do it. :-)
This is really interesting. My daughter has started making some of her own personal care products, I will pass this along.
Very cool! :) Do you make goat cheese too?
Great tutorial. I too have started making our own soap and the hardest part is deciding what kind to make! Thanks for the post.
Post a Comment